Affiliate Disclosure: This post contains affiliate links. If you make a purchase through these links, I receive a commission at no additional cost to you.
You have purchased an eSIM for South Korea, but when should you scan the QR code?
The Korea eSIM installation process differs between iPhone and Samsung Galaxy devices, and activation rules can also vary by plan.
Activating the plan too early or leaving data roaming enabled on your home SIM could result in lost validity or unexpected charges.
Here is how to prepare, install, and connect your travel eSIM without unnecessary stress.
This article was last checked on July 15, 2026. Menu names and activation conditions may vary by device and eSIM provider.
Table of Contents
1. What Do You Need Before Installation?
Before starting your Korea eSIM installation, make sure you have a compatible phone, a stable internet connection, and the activation information provided by the seller. Preparing everything at home is much easier than trying to troubleshoot after landing at the airport.
| What you need | What to check |
|---|---|
| Smartphone | Confirm that it supports eSIM |
| Carrier status | Make sure the phone is unlocked |
| Internet | Connect to stable Wi-Fi |
| Operating system | Install the latest supported update |
| Activation details | Prepare the QR code or manual activation code |
| Purchase details | Save your booking number and support information |
On an iPhone, open Settings → Cellular and check whether “Add eSIM” appears. On a Galaxy phone, go to Settings → Connections → SIM Manager. You can also dial *#06# and look for an EID.
Klook states that one QR code cannot be used on multiple devices. Do not test it on a different phone first. Install it only on the phone you plan to use in South Korea.
If your voucher contains a QR code, open it on a laptop, tablet, or another phone so you can scan it easily. You can also save the manual activation details in case the QR code does not work.
- Official guide: Apple eSIM setup requirements
2. When Should You Scan the QR Code?
The most important part of Korea eSIM installation is understanding the difference between installation and activation. Some plans can be installed before departure, while others begin counting down as soon as you scan the QR code.
| Wording on the voucher | What it usually means |
|---|---|
| Install before travel | You can install the profile before departure |
| Activate on arrival | Turn on the line after reaching South Korea |
| Validity starts upon connection | The plan begins when it connects to a supported local network |
| Validity starts after installation | The plan may begin as soon as it is installed |
| Activate within 30 days | Installation must be completed within the stated period |
Klook currently says that its featured South Korea travel plan can be installed before departure. Its data allowance and validity begin when the eSIM connects to a network at the destination.
However, this rule does not apply to every provider. Some plans start immediately after the QR code is scanned, while others must be installed within a specific number of days after purchase.
Installing the plan one or two days before departure is usually convenient because you still have access to reliable Wi-Fi and another device if you need help. Always check the Installation, Activation, and Validity sections of your voucher before scanning anything.
- Local carrier information: KT tourist eSIM
3. How to Install It on an iPhone
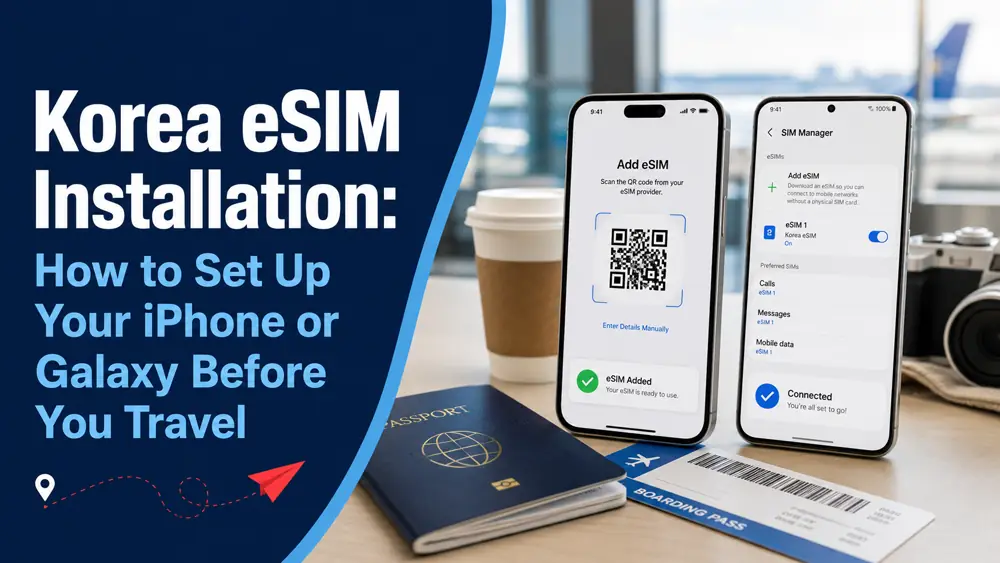
To complete Korea eSIM installation on an iPhone, use the Cellular or Mobile Service section in Settings. If your provider supports direct app activation, you may also be able to install it without displaying the QR code on another screen.
Install with a QR code
- Open
Settings. - Tap
CellularorMobile Service. - Select
Add eSIM. - Tap
Use QR Code. - Scan the QR code from your voucher.
- Follow the prompts to add the cellular plan.
- Label the new line
Korea Travelor something similarly clear.
If you received the QR code on the same iPhone, check whether the provider’s app offers an Activate or Add eSIM to device button. Some plans also include an SMDP+ address and activation code that you can enter manually.
After installation, keep your home number as the default voice line. Do not select the travel eSIM as your data line or enable its data roaming until the activation conditions say it is safe to do so.
| iPhone setting | Recommended before departure |
|---|---|
| Travel line | Installed but turned off if required |
| Cellular data | Keep your usual line selected |
| Data roaming | Off for the travel line before arrival |
| Default voice line | Keep your home number |
| Allow Cellular Data Switching | Turn off to reduce roaming risk |
On iOS 26, your iPhone may display a Turn On Travel eSIM notification when you arrive. You can then choose whether to use only the travel line or keep both lines active.
- Travel settings: Apple international eSIM guide
4. How to Install It on a Samsung Galaxy
On a Samsung phone, Korea eSIM installation is handled through SIM Manager. The exact wording may vary depending on the Galaxy model, country of purchase, and One UI version, but the process is generally the same.
Install with a QR code
- Open
Settings. - Tap
Connections. - Select
SIM Manager. - Tap
Add eSIM. - Select
Scan QR code. - Scan the code provided by the seller.
- Wait for the mobile plan to download.
- Label the new line
KoreaorTravel.
If the QR code cannot be scanned, look for an option to enter the activation code manually. Only use the information provided by your eSIM seller.
Keep your phone connected to Wi-Fi until the download is complete. Do not close the Settings app or restart your phone during the initial installation.
Before departure, leave your home SIM selected for mobile data and keep data roaming turned off on the travel line. If the new eSIM appears in SIM Manager but does not show a network signal, it may simply be waiting to connect in South Korea.
- Official instructions: Samsung Galaxy eSIM setup
5. What Should You Do After Arriving in Korea?
Even if you completed Korea eSIM installation before departure, you will usually need to change several mobile-data settings after landing. Simply installing the profile does not always connect it automatically.
Settings to change after arrival
- Turn off Airplane Mode.
- Turn on the South Korea travel line.
- Select the travel eSIM for mobile data.
- Enable data roaming on the travel line.
- Keep data roaming off on your home SIM.
- Set network selection to Automatic.
- Wait a few minutes and test the connection.
Many international travel eSIMs connect to SKT, KT, or LG U+ through a roaming arrangement. That is why data roaming may need to be enabled on the travel line even though you are using it in the destination country.
Be careful to enable roaming only for the travel eSIM. If you also enable it on your home SIM, your regular carrier may charge international roaming fees.
If the connection does not appear immediately, turn Airplane Mode on for about 10 seconds and then turn it off. If that does not work, restart the phone and check that network selection is set to Automatic.
- iPhone roaming settings: Apple data roaming guide
6. How Do You Keep Your Regular SIM Active?
If your phone supports Dual SIM, you can finish Korea eSIM installation without removing or disabling your regular number. Use the travel line for data while keeping your home SIM available for calls and text messages.
| Feature | Recommended line |
|---|---|
| Mobile data | South Korea travel eSIM |
| Texts to your regular number | Home SIM |
| Regular voice calls | Home SIM or Ask Every Time |
| Maps, translation, and messaging apps | Travel data line |
| iMessage and FaceTime | Your existing number can remain active |
Keeping your original SIM active can be useful when you need bank or account verification messages. However, international charges for receiving calls or texts depend on your home carrier.
Before departure, check your carrier’s roaming policy. Receiving an SMS is free with some providers but not with others, and answering an incoming call may trigger roaming charges.
To reduce the risk of accidental data usage:
- Turn off data roaming on your home SIM.
- Select the travel eSIM as the only mobile-data line.
- On iPhone, turn off
Allow Cellular Data Switching. - Avoid answering calls on your home number unless you know the cost.
7. What If the eSIM Does Not Connect?
If Korea eSIM installation appears to be complete but you cannot access the internet, do not delete the profile immediately. Many travel QR codes can only be used once, so deleting the profile may prevent you from reinstalling it.
| Problem | What to check |
|---|---|
| QR code will not scan | Wi-Fi connection and whether the code was already used |
| Cellular plan cannot be added | Carrier lock and installed eSIM limit |
| Line appears but data does not work | Mobile-data line and data-roaming settings |
| No network signal | Automatic network selection and Airplane Mode |
| Only 3G or a slow connection appears | Restart the phone |
| Activation code is invalid | Check whether it was used on another device |
On an iPhone, turn Airplane Mode on and off, disable and re-enable the travel line, and then restart the device. You can also open Settings → General → About to check for a carrier settings update.
On a Galaxy phone, confirm that the travel line is enabled in SIM Manager and selected for mobile data. Some providers require specific APN information, but you should only enter an APN supplied by the seller.
If the issue continues, take screenshots of the error message and prepare your booking number before contacting support. Do not remove the eSIM profile until the seller tells you to do so.
Frequently Asked Questions
Do I have to scan the QR code after arriving in South Korea?
Not necessarily. Some Klook plans can be installed before departure and begin only when they connect to a supported network in South Korea. Other plans begin as soon as you scan the QR code, so read the activation and validity conditions first.
How do I install a QR code received on the same phone?
If your seller supports direct installation, use the activation button in its app or booking page. Klook offers an Activate or Add eSIM to device option for supported plans. Otherwise, display the QR code on a laptop, tablet, or another phone and scan it with the phone you will use.
What should I do if it does not connect after I arrive?
Confirm that the travel line is enabled, selected for mobile data, and has data roaming turned on. If the Korea eSIM installation still does not work, toggle Airplane Mode, restart the phone, and contact the seller without deleting the profile.
Key Takeaways
Korea eSIM installation involves more than scanning a QR code. Check when validity begins, install the profile using stable Wi-Fi, and select the travel line for mobile data after arriving in South Korea. Enable data roaming only on the travel eSIM, keep it off on your home SIM, and do not delete the profile if you experience a connection problem.